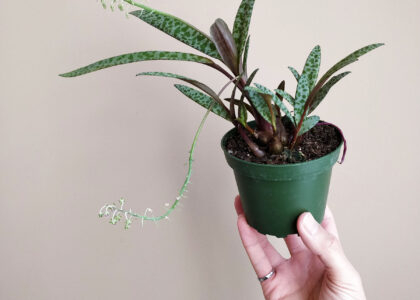
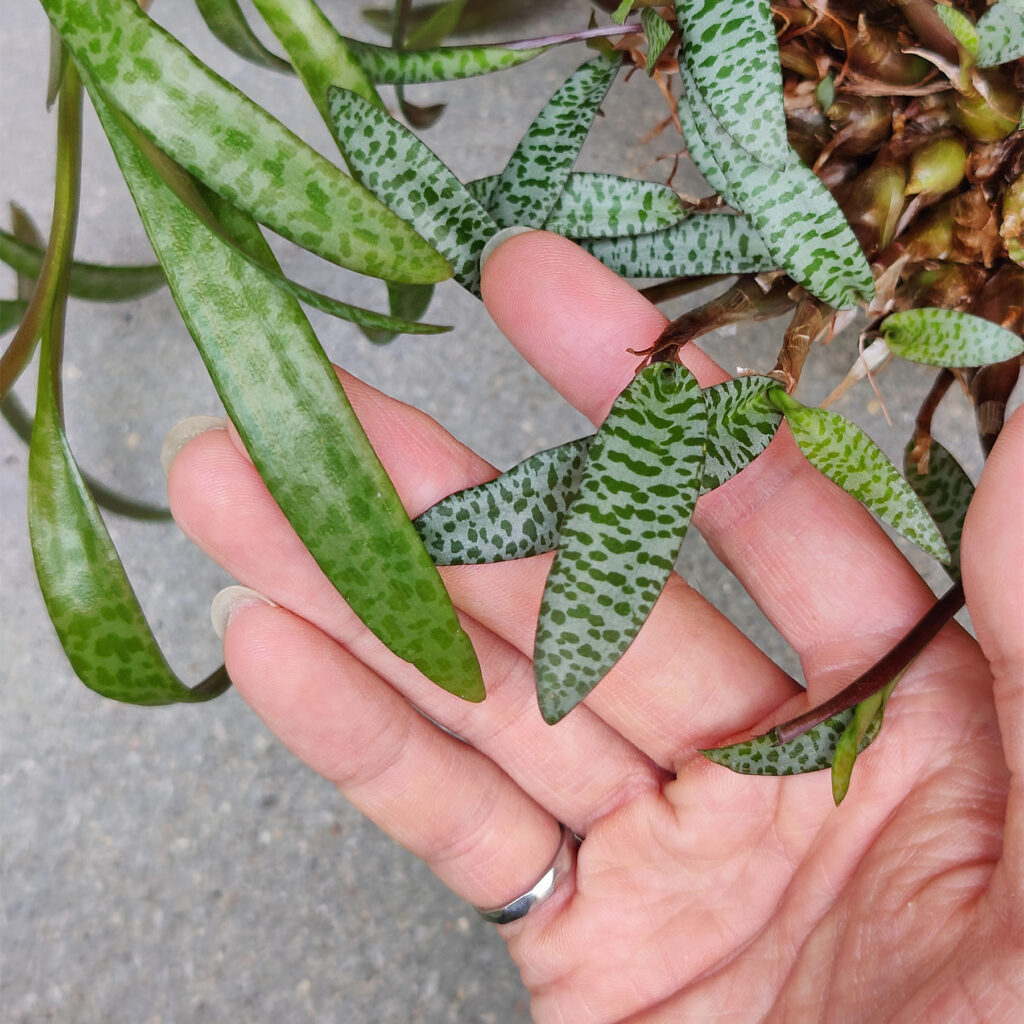
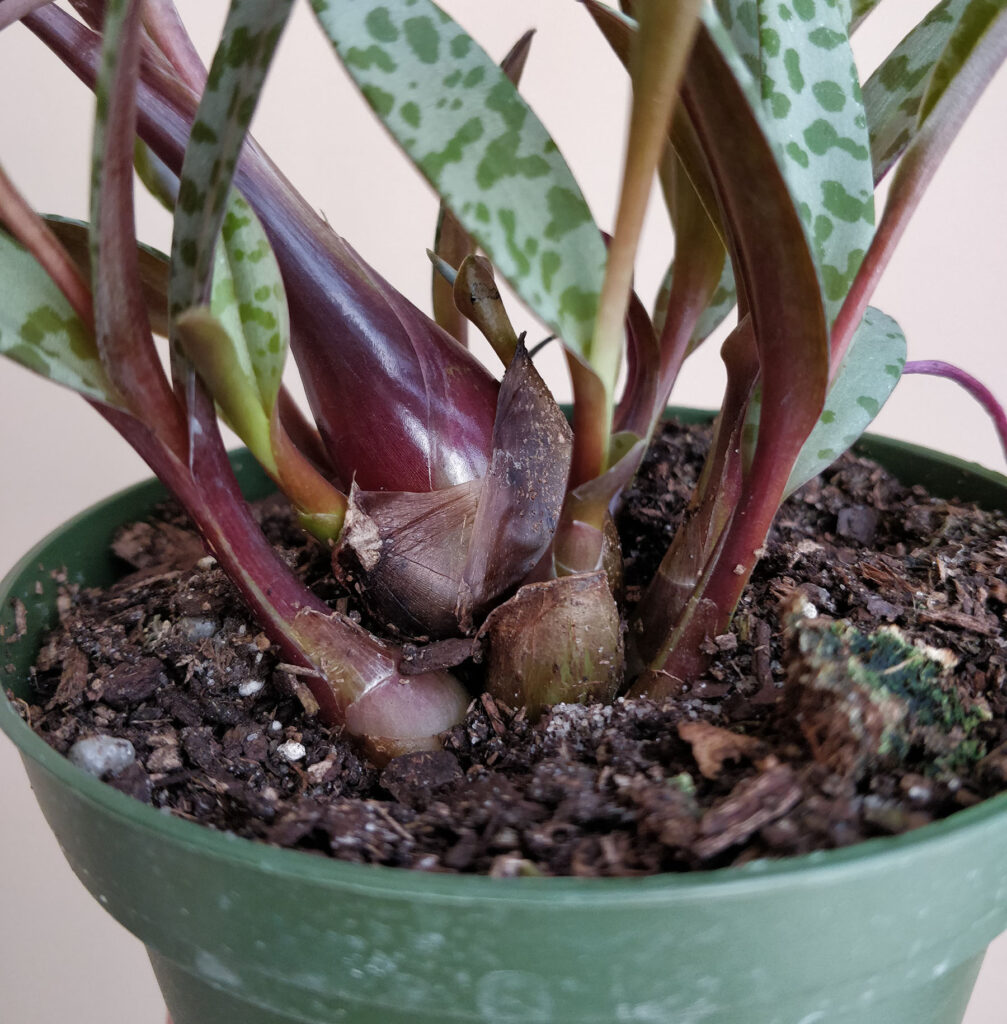
I was first introduced to the Silver Squill/Leopard Lily plant when it was given to me as a gift: I bought some other plants from a nice lady who included two small Silver Squill plants (4″ pots). Two features that caught my eye: the leopard-like pattern on the leaves and the bulbous base that forms a nice clump at the soil surface.
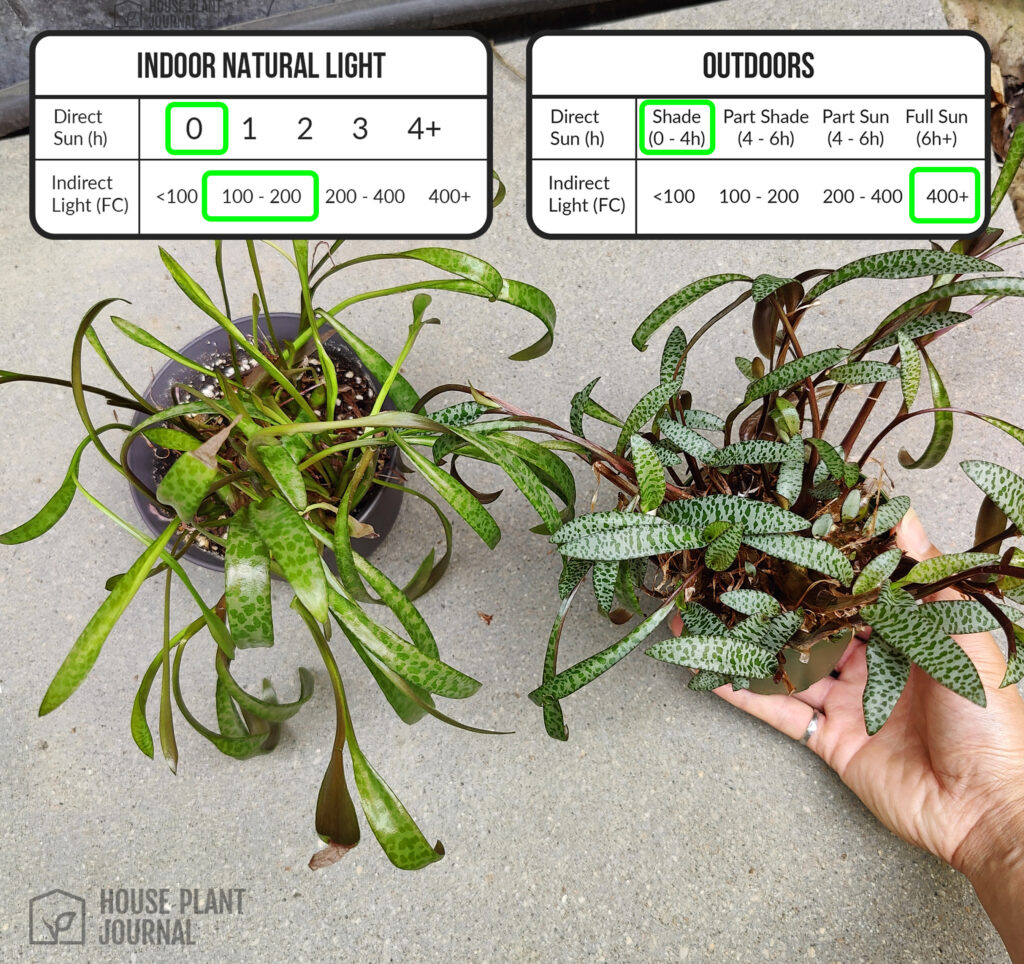
The striking leopard pattern will appear faded (left) if lighting is poor (grown indoors). The plant on the right was grown outdoors in the shade – more on this experiment later!The leaves emerge from bulbous stems that form a clump along the soil.
Silver Squill Leaf Development:
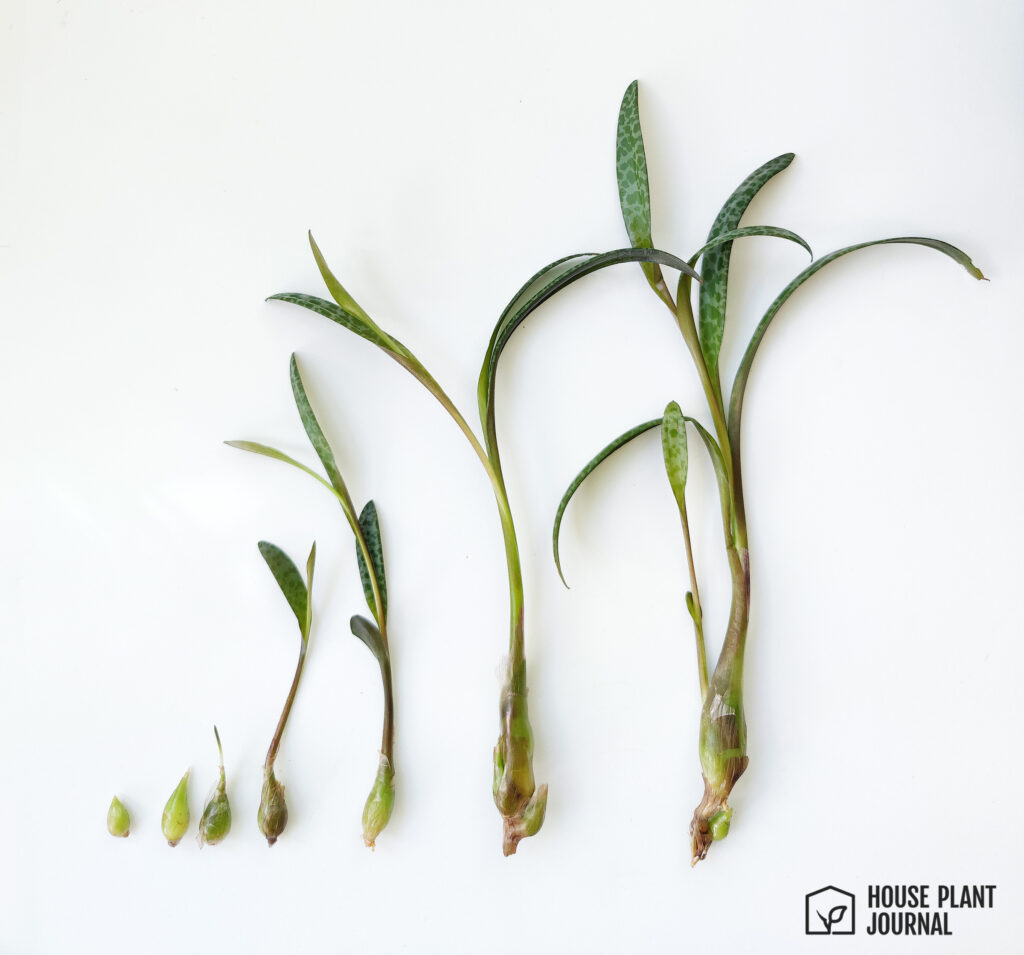
As the plant continues to grow, you’ll notice more clumps forming at the soil surface. In a few months (with rapid growth), they could take over the pot. I removed several “bulbs” at different stages:
From tiny bulb to a few leaves, to multi-bulb clump. To propagate, you can easily break off intact bulbs and transplant them directly into moist soil.
Silver Squill Light Requirements
Every website will say: bright, indirect sunlight. — which is vague and unhelpful.
Here are three specific (and common) lighting contexts and the resulting growth – with detailed measurements and pictures.
Poor Lighting
Since I have two plants, I was able to conduct an experiment to see how well the plant would grow based on having different lighting conditions.
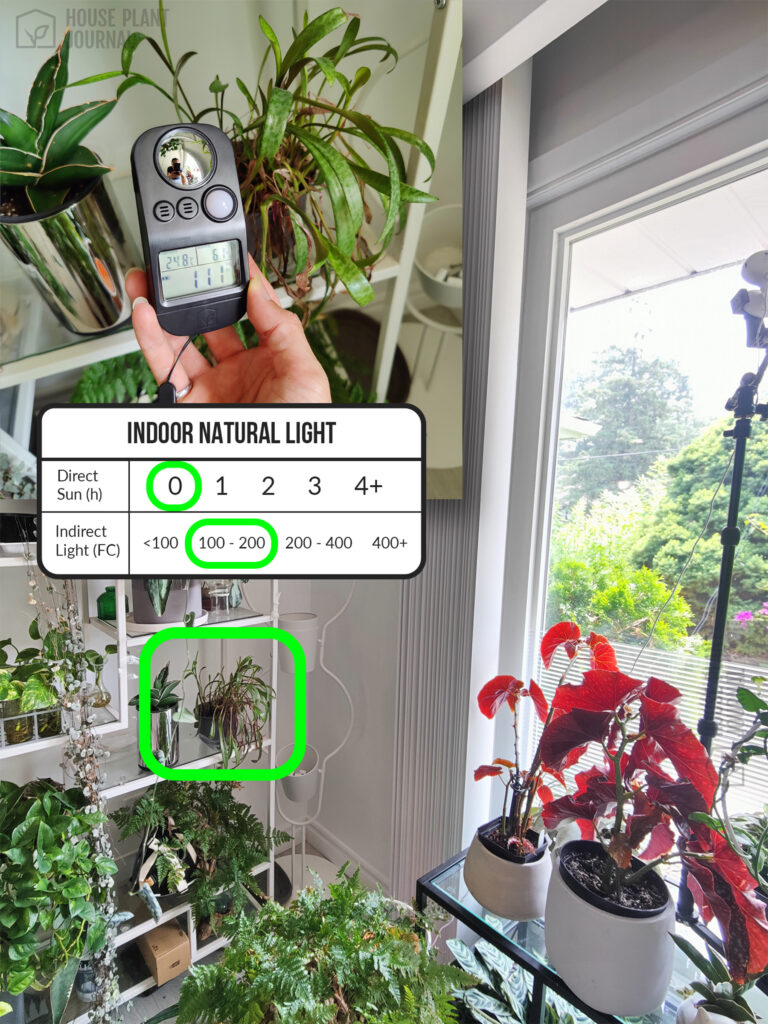
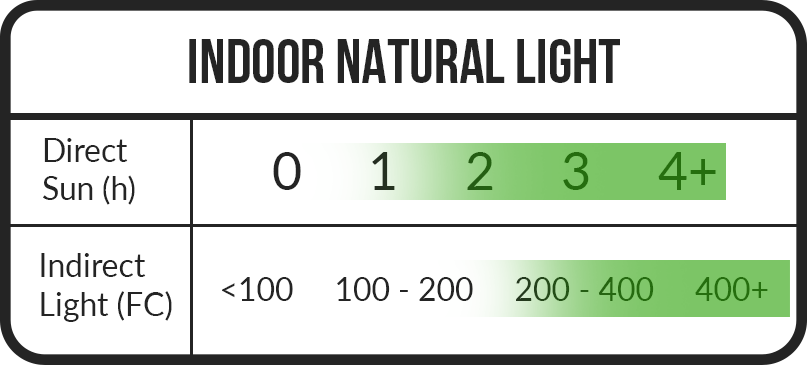
I kept one of my plants “near a south-facing window” – whether this qualifies as “bright indirect light” is pointless. What’s more useful is to evaluate the light situation using the Indoor Natural Light chart – this spot gets zero direct sun and the indirect light is in the 100-200 FC range.
I would consider this light situation to be “poor lighting” because the result, after several months, is leggy growth and weak leaf coloration: (left)
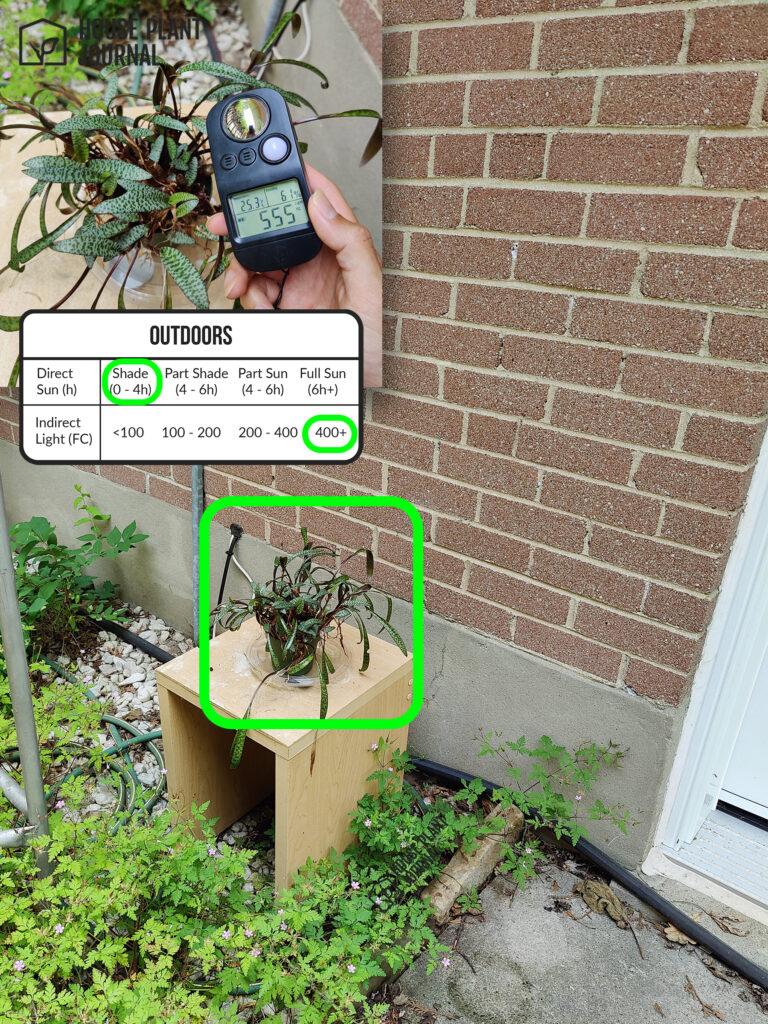
Comparison: about a year before this photo, I divided my Silver Squill into two pots. When summer arrived, I put one outside in a shaded area next to my house (right) and the other stayed indoors near a south-facing window (left). See the difference after a few months?
Light Recommendation for Outdoors:
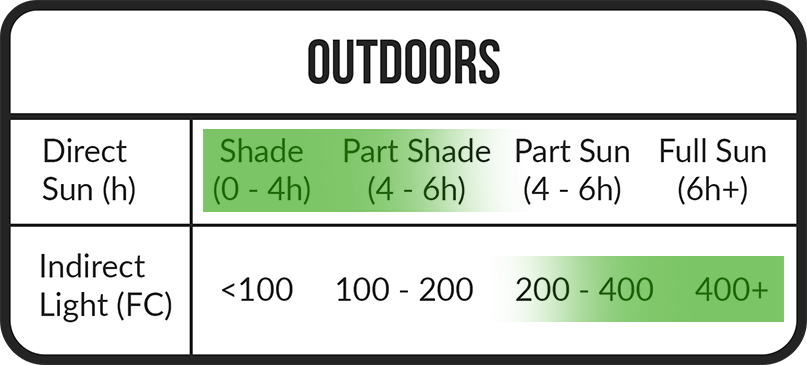
For the Outdoor lighting context, the Silver Squill will grow well with Shade (0-4h direct sun) up to Part Shade (4-6h direct morning or late afternoon sun). Notice the indirect light strength is still above 400 FC, which basically means a large portion of the sky should be visible to the plant.
Indoor Natural Light Recommendation:
For best results with indoor natural light, at least 1 hour of direct sun would be good plus indirect light above 200 FC. With longer direct sun exposure, you’ll want to be extra observant for when to water (more on that in the watering section).
Grow Light Strength:
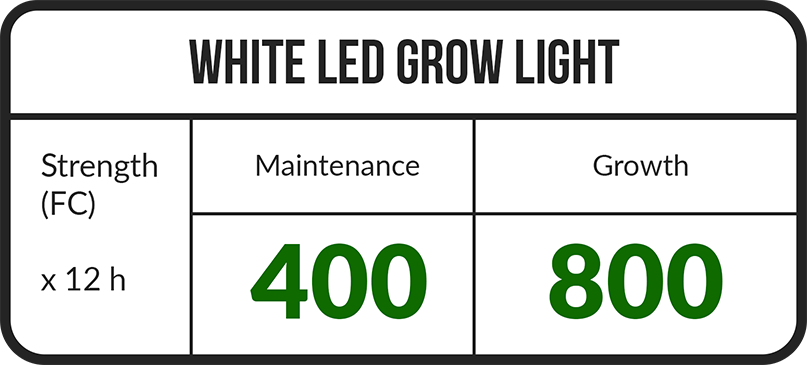
If you’re just maintaining the Silver Squill for the winter, 400 FC x 12 hours from a white LED light will maintain a good leaf pattern. The resulting DLI will be 3.5 mol/day.
To push for good growth, getting up beyond 800 FC x 12 hours would get you a DLI of 6.9 mol/day.
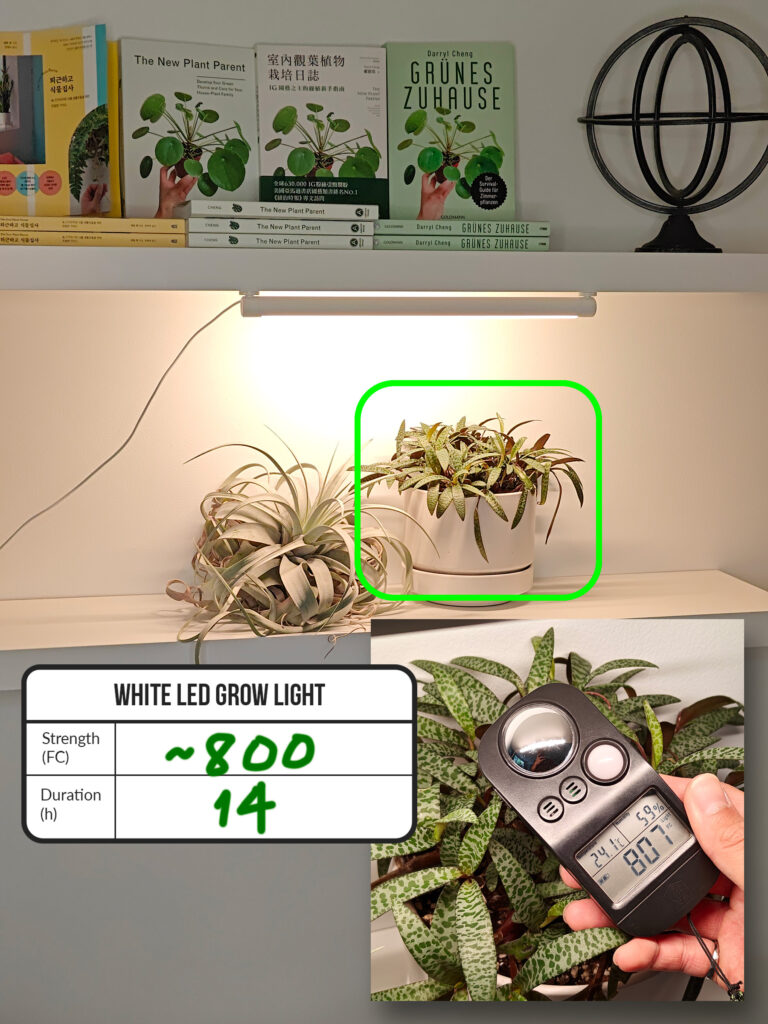
For one winter, I put the Silver Squill on a floating shelf and installed a Soltech Grove Bar LED light. I measured about 800 FC at the leaf and kept the light on for 14 hours a day – which is closer to 8.1 mol/day.
Read my full review of the Soltech Grove Bar LED light HERE.
Fertilizer
As with all foliage plants, the ideal NPK ratio is 3-1-2. You can use a liquid diluted into your watering can or a slow-release fertilizer left in the substrate.
WHEN to water: whenever the substrate is completely dry. This plant holds water in its bulbous base so it can tolerate drought very well. If you let it go dry for too long, however, the bulbs will start to wrinkle – try not to let it get this far dry.
HOW to water: fully soak the substrate.
Propagation/Repotting
With excellent light, the Silver Squill will keep growing new bulb that will eventually fill out the pot. At this point, you can either repot into a slightly larger pot or break off some bulbs to start a brand new pot. The bulbs separate easily – they can be broken off by hand. Push them into a pot of suitable substrate and water thoroughly – you should initially keep the substrate semi-moist as new roots develop. After a few weeks, the plant should be rooted.
Ideal substrate: 1 part potting soil with 1 part coarse sand. I prefer coarse sand instead of perlite because the sand particles are smaller and heavier, allowing the Silver Squill to better anchor itself – too much perlite would make the substrate too loose.
House Plant Journal: Silver Squill Total Reset
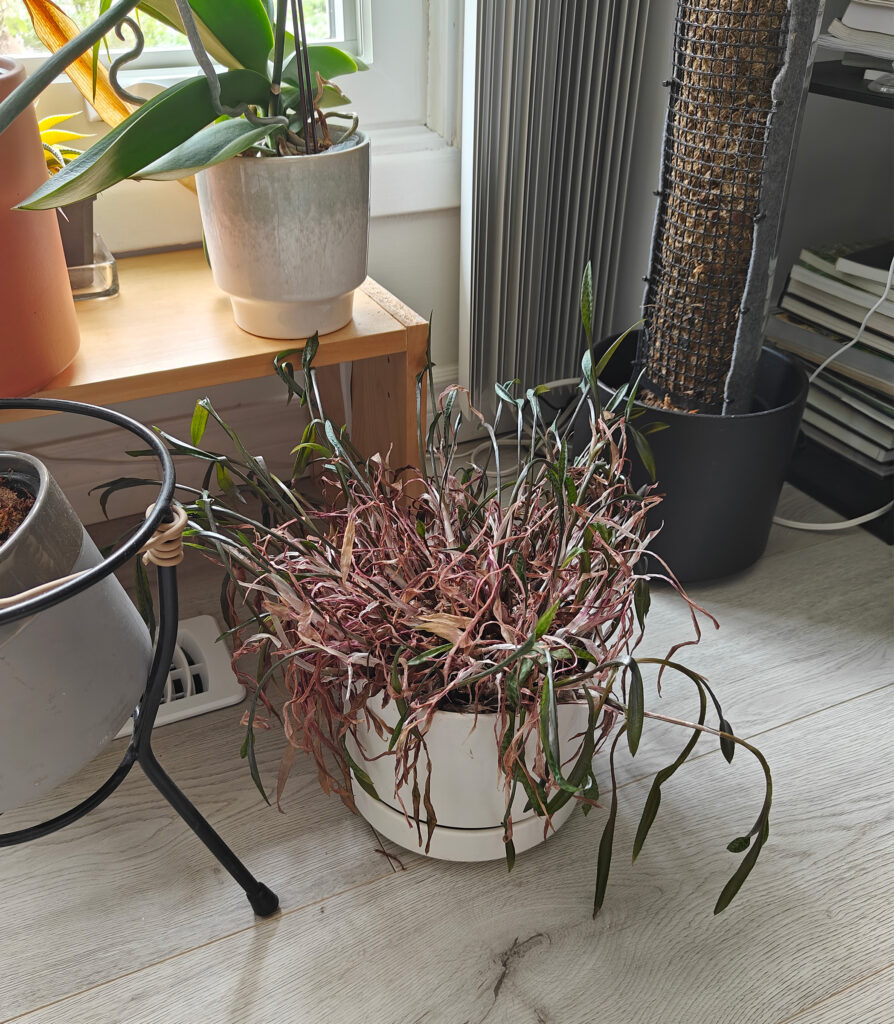
One year, we were renovating our living room so I had to move the Silver Squill to a different area with less light. A few weeks became almost a year of poor lighting and neglectful watering and the plant looked terrible.
It’s not dead yet!
There were still some new leaves growing but the majority had dried up. The root system should still be intact and have the energy to grow new leaves in the right conditions!
The reset: cut everything off
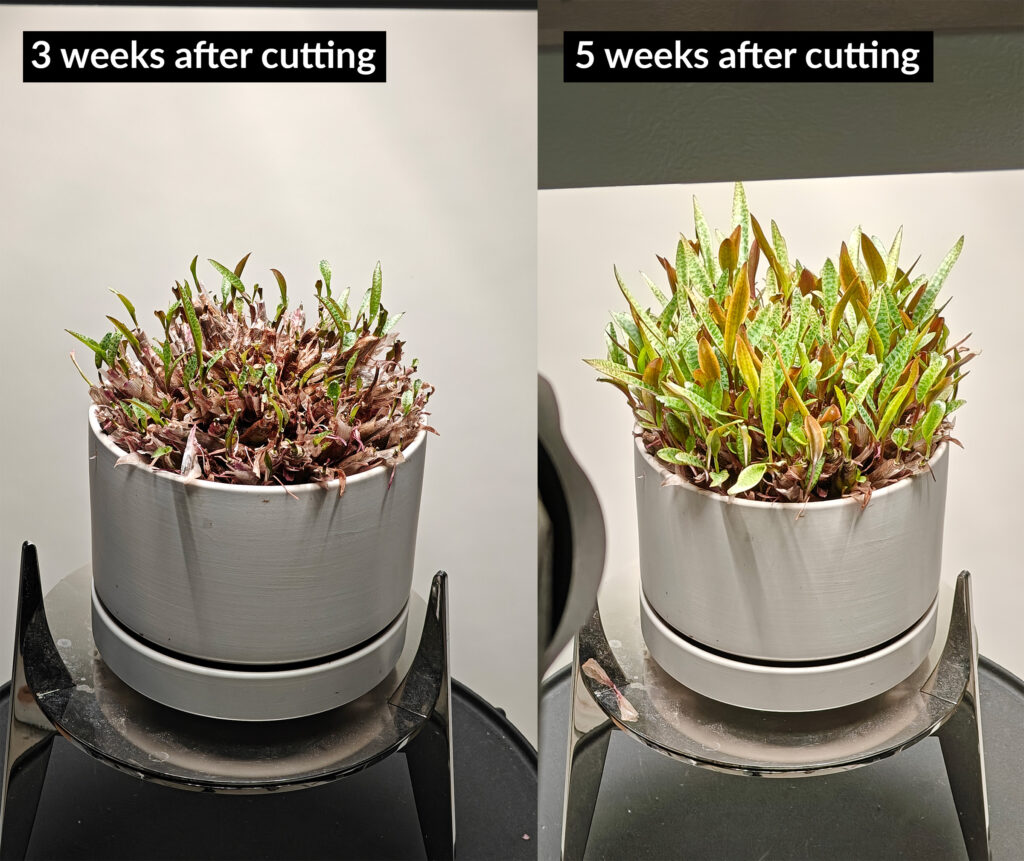
The first step to reset the plant is to cut off all the dead foliage – in this case, I decided to simply cut everything off. Try your best not to damage the bulbs – this is where the new leaves will eventually emerge.
The growing conditions
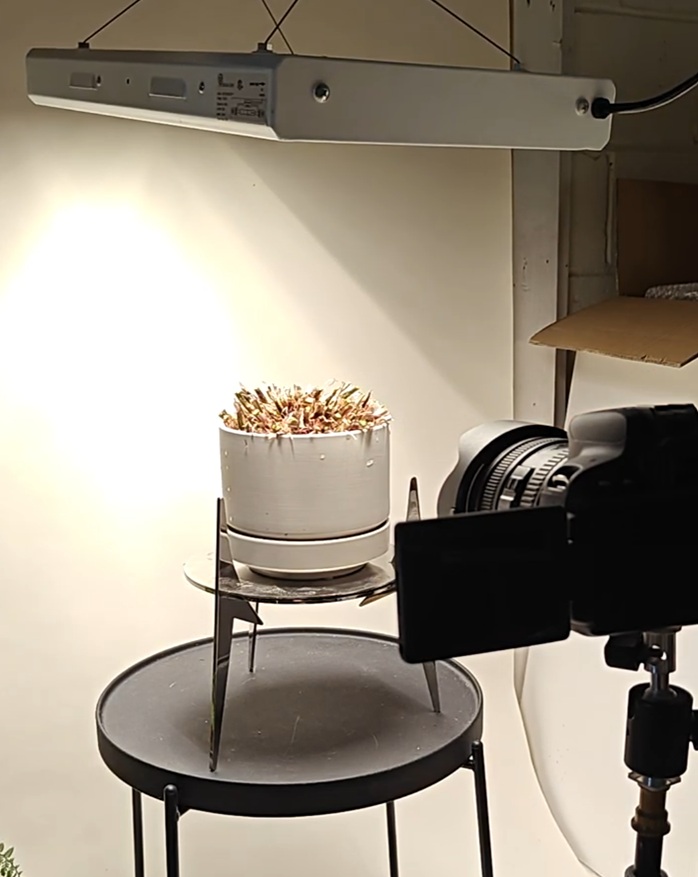
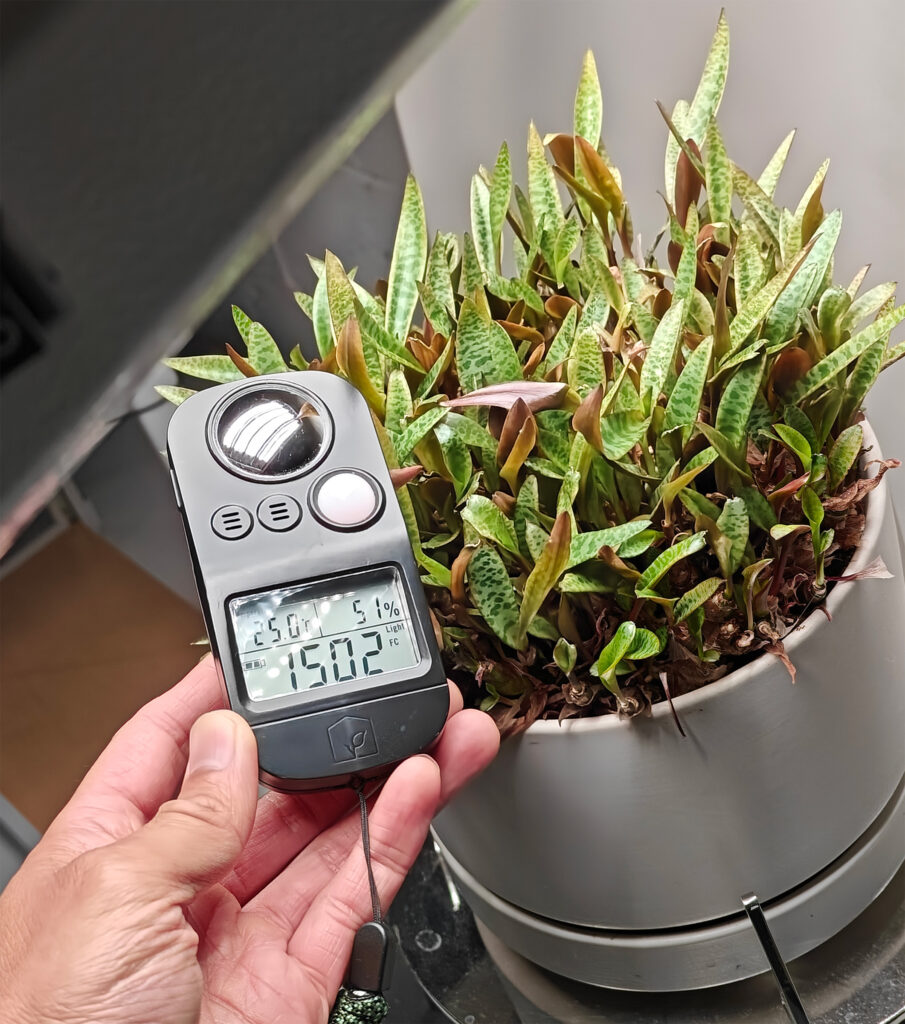
For best results, you should repot the plant into fresh substrate – I was impatient and just added some 3-1-2 slow-release fertilizer without changing any of the soil. The critical part: light. I put the Silver Squill under my large grow light, measuring around 1500 FC (~270 µmol/s/m²) at leaf level and kept it on for 24 hours. NOTE: you don’t need to set your grow light for 24/7 lighting; I only did this for photography purposes – so the lighting wouldn’t change. For a normal re-grow, 1500 FC x 14-16 hours/day should suffice.
Light settings: about 1500 FC (~270 µmol/s/m²) at leaf level x 24 hours per day.
Grow light strength recommendations by plant: HERE